

Late the other night a friend emailed me, “Are you there? I’m having a yogurt making emergency!” I had her call me so we could troubleshoot together. It seems that I have been giving a lot of yogurt making instruction lately, and I love it. There are so many things I still want to learn, but yogurt is one of those things I feel like I’ve got down.
This is why I love making homemade yogurt:
- I get a real “stick it to the man” feeling from making something at home that most people think you have to buy. Rebellious, I know.
- When I make yogurt at home, I know exactly what is in it. My ingredient label would look like this: milk, live active cultures (L. Bulgaricus, S. Thermophilus)
- Last, but certainly not least, the taste! Oh my goodness. It’s thick. It’s creamy. It has a sweet freshness that store-bought yogurt could only dream about then wake up and find itself sourly disappointed.
I started making yogurt at home about a year ago after reading blog post on making yogurt in your crockpot. It sounded easy so I decided to give it a try. Thank goodness my first batch turned out or I would probably never have tried again. Sadly, my second, third and fourth batches could never replicate the goodness of that first one. The crockpot method was just not consistent enough.
I’ve spend the last year playing around with methods and ingredients and think I have hit upon a near perfect recipe.
Side note:This book really helped me perfect my technique:
Milk: The Surprising Story of Milk Through the Ages
I highly recommend it for learning how to make all kinds of dairy products at home.
I’ll give you the basic method first so you can get a general idea, then follow up with the an annotated version.
1. Heat milk to near boiling.
2. Cool to about 110°.
3. Stir in yogurt starter.
4. Keep warm for at least 4 hours.
5. Strain, if desired.
Easy-peasy, right? Now for the details:
1. Heat milk to near boiling.
Let’s start off by talking about milk. In order for your yogurt to become thick and creamy, the milk you use needs to have some fat in it. If you are using milk from the grocery store, opt for whole milk (preferably hormone-free) and not ultra-pasteurized. That is what I used for many months, right up until I met Daisy.
This is a Daisy:

This is her milk:
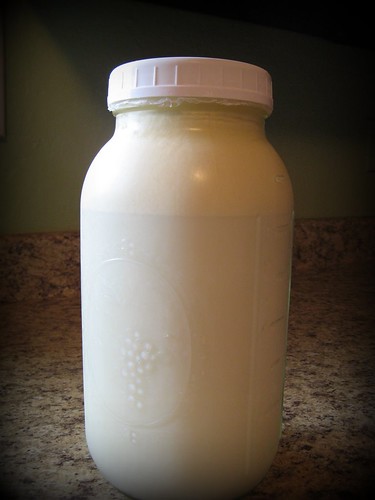
See the cream rising to the top? Yummy.
Note: the yogurt making instructions are basically the same whether you are using pasteurized/homogenized or raw milk. Where there may be differences I’ll let you know.
Heating the milk
If you have a candy thermometer, get it out. It comes in handy while you are learning. I no longer use one because I broke it I have made yogurt enough that I know what the right temperature looks and feels like. You’ll get there too, but to begin with, a thermometer is handy.
We want to heat between 1 and 8 cups (a half gallon) of milk in a non-reactive pan (not copper or aluminum) until it reaches 180°.
Here is where many raw milk drinkers will tell you that heating the milk kills all the beneficial bacteria in the milk (correct) and is not necessary for making yogurt (sort of correct).
In this one instance, I want to kill the bacteria. I’ll tell you why when we talk about our yogurt starter.
As for being able to make yogurt without heating the milk, it is true that you can make yogurt without heating to near boiling, but it will never be as thick or lovely as milk that has been heated. This is because the heat actually changes the protein structure of the milk.
So cook that milk.
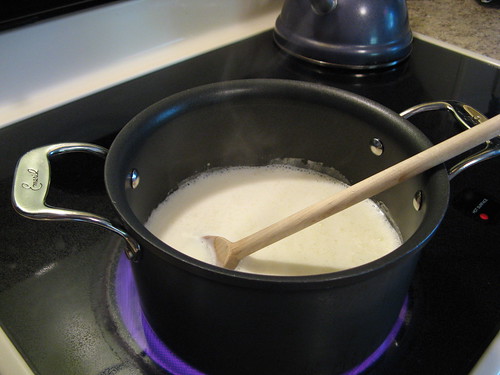
Stir or don’t stir, I don’t care. Just heat it until about 180°. If it gets a bit hotter, that’s okay. You just don’t want it to boil. It won’t hurt your yogurt any, but boiling milk expands and boils over quickly. That makes a big mess!
2. Cool to about 110°.
When your milk has reached the proper temperature, take your pan off the heat. We now need the milk to cool to 110° (like warm bath water). This is an optimal temperature for culturing your yogurt. Much hotter and the bacteria will die; much colder and it won’t reproduce.
I cool my milk by putting the pan into a sink of cold water.
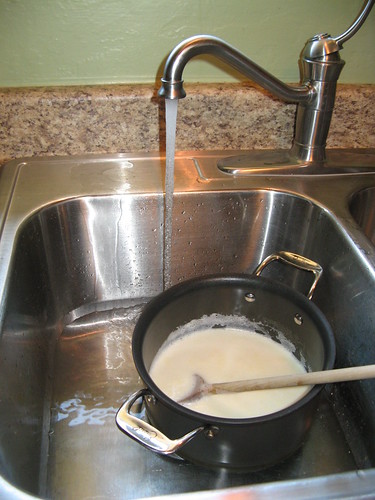
Keep an eye on it. It cools quickly. If it does happen to get too cold, just heat it up again. It really won’t hurt my feelings.
3. Stir in yogurt starter.
While your milk is cooling, prepare your starter culture.
All this is is plain, unflavored yogurt. Look for live active cultures on the label and buy the best quality you can find; it makes a difference.
Edited to add: Full-fat is best; reduced or fat-free often has stabilizers to make it thick. It’s possible that they could interfere with the culturing process…
I have had good success with both Stonybrook Farms and Nancys, but my favorite was Fage Greek Yogurt.
I say was, because I have found something even better. I recently bought an heirloom culture from Cultures for Health. If you use a store-bought yogurt for your starter you can then use your own homemade yogurt to start the next batch. However after two or three batches, the culture weakens and will not work anymore. An heirloom culture, properly cared for, can be used to start your next batch indefinitely (just like sourdough starter).
One thing to consider if using raw milk, is that the bacteria present will compete with your heirloom culture, weakening it over time. That’s why I said that in this instance I want to kill that lovely, beneficial bacteria.
Pasteurized milk is already dead, so it should have nothing to compete, but I still bring it up to near boiling to kill any nasties that might be lurking there.
Get out the container you plan to incubate your yogurt in. I use glass canning jars. Make sure they are very clean; you may even want to give them an extra rinse with hot water. To your empty jar/jars, add about 2 teaspoons of starter for every cup of milk you plan to culture in it.
Reminder, quart jars hold four cups; pint jars hold two.
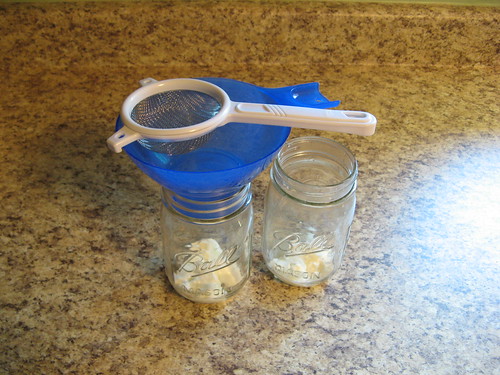
If you have a funnel and a fine mesh strainer, now is the time to use them. When the milk has reached 110°, pour it through the strainer into your container.
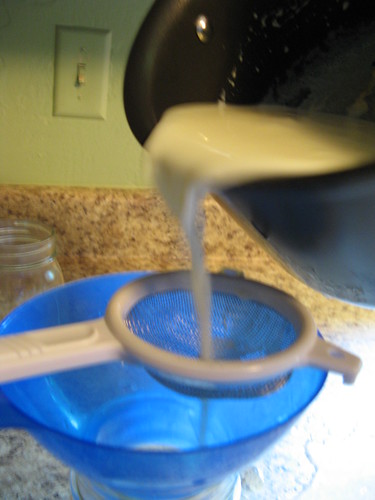
Note: If you try to pour with one hand and take a picture with the other, you are likely to spill some milk and get a blurry photo.
Want to know why I use a strainer?
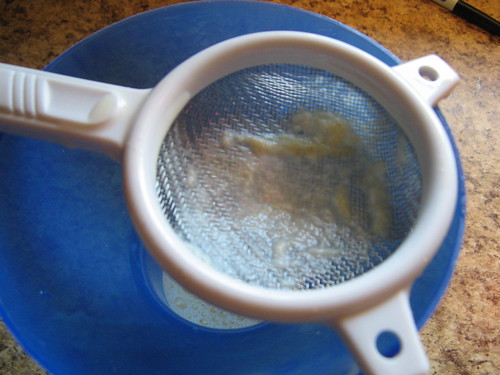
I don’t want those yucky cooked bits in my yogurt. And they will form whether you stir your milk as it heats or not. That’s why it doesn’t really matter if you stir or not.
It may not matter when you heat, but it matters now. Stir the milk and starter together. I use a fork, cuz I’m cool like that.

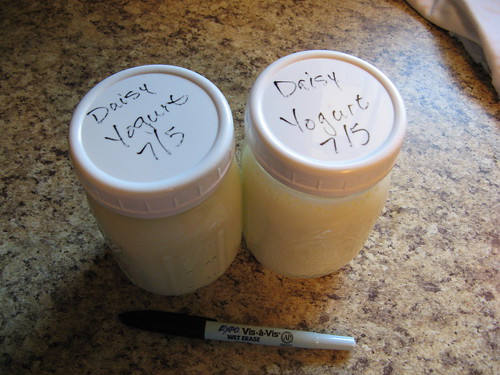
Put lids on. If you are planning to store your finished yogurt in the same jars, you may wish to label them with a wet erase marker.
I love the plastic lids for jars. I bought mine at Walmart, in the canning aisle, but they are also available on amazon.
Wide-Mouth
Regular
4. Keep warm for at least 4 hours.
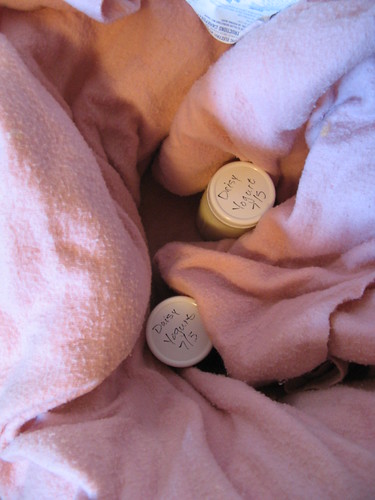
Now it’s time to tuck in your little bacterial cocktail (yum) and let it work it’s magic. It needs to stay at about 110° (really, 105° – 115° should be fine) for at least four hours.
In my hall closet, I keep an electric blanket in a fabric bin. When it is yogurt-time, I pull it out and turn it on high. I nestle my jars into it and let it do it’s thing.

If you don’t have an electric blanket, here are some other methods:
- Place your jars in the oven with the light on.
- Wrap your jars in a blanket and put them in a cooler.
- Put your jars in a cooler and add a few inches of hot water. Replenish water as needed.
- Make a yogurt incubator out of a light bulb and some coffee cans.
- Put your jars on a heating pad, but make sure it is not the kind that turns itself off.
- Pour your milk mixture into a very clean thermos with a tight fitting lid.
Just please do not waste your money and cabinet space on a yogurt maker. You really don’t need one.
It will take at least four hours to make yogurt. The longer you let it incubate the more thick it will become. It will also develop a more sour flavor. You may have to make yogurt a few times to find the right balance. I will say that even when I have forgotten my yogurt and let it incubate for 15 hours, it was still sweeter (as in the opposite of sour) than store bought.
To know if your yogurt has set up, take one of your jars and tilt it. You should see a the yogurt pull away from the side. If there is a yellowish liquid surrounding it, don’t worry. That’s just whey.
It may be a bit hard to see in this photo, but you’ll recognize it when you try it.
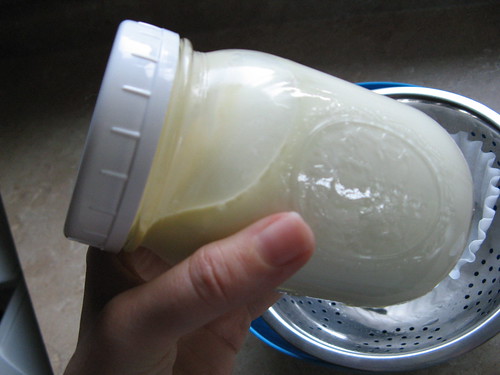
If you are using non-homogonized milk, you may also see a yellowish layer on the top. Lucky you! That’s just the cream rising.
5. Strain, if desired.
At this point, I like to strain my yogurt. Straining not only results in a thicker final product, it also creates a less sour one. The whey is what has the sour flavor and it continues to ripen with age. Straining your yogurt makes it sweet and fresh tasting, and keeps it that way for longer.
Place a strainer over a large bowl. Line with a clean linen towel or, for smaller batches of yogurt, a coffee filter. Just please don’t waste your money on cheesecloth.
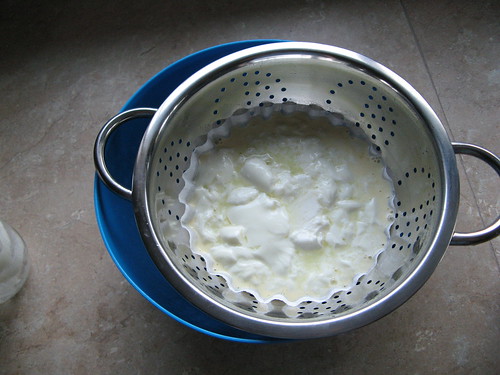
The longer you strain the thicker your yogurt will be. You could strain anywhere from 15 minutes, for a slightly thicker yogurt, to overnight for yogurt cheese.
When finished, pour your whey into a jar and reserve for other uses (I’ll post on those soon), or feed it to your pets or plants.
Then dump your yogurt into a bowl. It will be clumpy. Especially if you used non-homogenized milk.
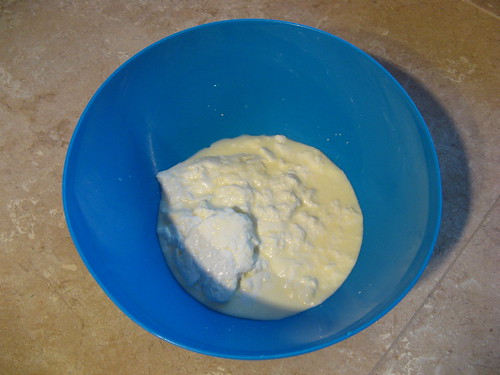
Not very appetizing, right?
But we can fix that. Just whisk, whisk
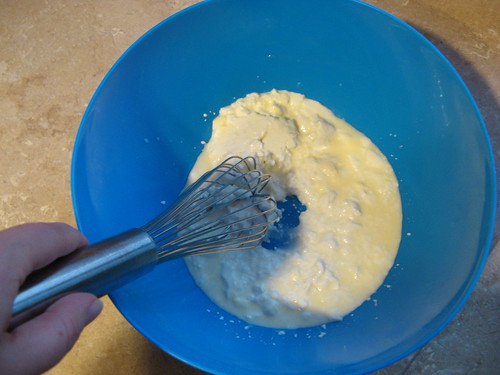
whisk
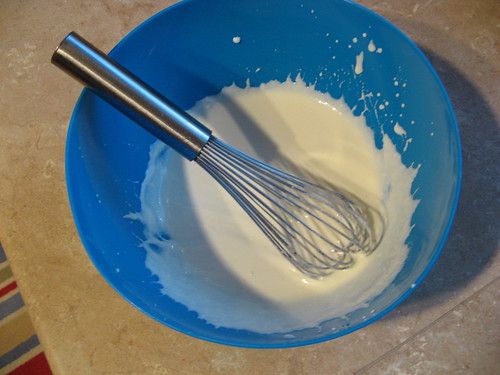
until smooth.
I probably could have whisked this batch a little longer. Or even better, used my immersion blender.
The yogurt will get all soupy again and you will worry that you have ruined it, but never fear! you did not. Once it has been refrigerated it will set up nice and lovely again.
Regular Ending
After whisking, spoon into a large container or jar.
Refrigerate until cool.
Sweeten with freezer jam, honey or real maple syrup before eating.
Super-Fancy Alternative ending
Place a couple of spoonfuls of jam each into the bottom of 8 oz. glass or these awesome plastic jars. Fill with your whisked yogurt.
Refrigerate.
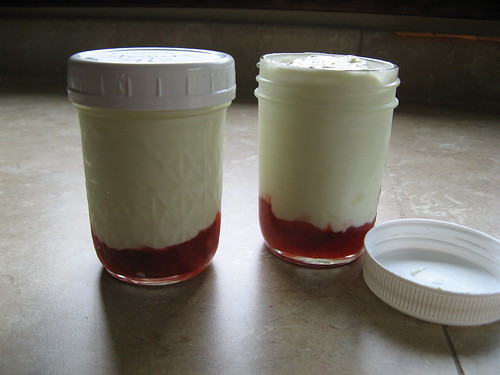
Voila—fruit on the bottom yogurt all ready for breakfast or the lunch box. Fancy, indeed.
I hear it is good for 10 – 14 days, but ours gets eaten long before then.
Troubleshooting
Yogurt didn’t thicken.
Likely problem: Your starter may have been weak or your milk mixture was too cold. No need to throw it out, just use it in smoothies.
Yogurt ended up with a little bit of curds and a lot of whey. Nothing creamy.
Sadly, it sounds as though your milk was too hot when you added starter. Or your incubator was too hot. Either way, it killed the culture. Please don’t give up; try again.
Any other questions or suggestions? Put them in the comments.
Oh, and, if you are local (Willamette Valley, Oregon), and want some of my starter, I am happy to share. Let me know.
End note: Amazon Affliate links are being used. If you purchase anything from my links, I get a miniscule tiny small commission. However, I would never recommend any product I didn’t use, and love, myself. Thank you.
I was not compensated in money, product, or any other way for recommending Cultures for Health products. I just like them.
PS: If you liked this, check out my recipe for homemade frozen yogurt. Yummy!


Nice! I made strawberry jam the other day, and I can imagine that fresh homemade yogurt would go so nicely with it. I think I might have to try this.
So, the starter – are you saying that I could just buy a container of Fage from the grocery store and use that as the starter?
If I wanted to start small and just make 2 pints, I would need:
4 cups of milk
8 tsp of yogurt
right?
How much do you set aside of your yogurt to use as a starter for next time? If I put the jam in it, I assume I can’t use it again, right?
So many questions!
My answers in bold.
So, the starter – are you saying that I could just buy a container of Fage from the grocery store and use that as the starter?
Yup. You use it as it, right from the container.
If I wanted to start small and just make 2 pints, I would need: 4 cups of milk 8 tsp of yogurt right?
That’s correct.
How much do you set aside of your yogurt to use as a starter for next time? If I put the jam in it, I assume I can’t use it again, right?
That’s right. I usually set some aside in a separate container marked “Do not eat” and keep it in the fridge for next time.
Good luck! Please let me know how it turns out.
Great post! You just may have convinced me to try it again after such a long break. Now that you’ve done all the problem-solving it may be worth it! Way to go! I do have a feeling, though, that if I do make homemade yogurt it will become more expensive than store bought because we’ll eat it faster! Have you found a way to keep it for yourself?! (sneaky laugh inserted!)
Janalyn – you may have to hide it. :o)
Actually, you might find that your family is eating a lot more at first, but once they get used to it, they’ll likely settle down – just like bread making.
I dare you to try it – I’ve got some starter here with your name on it.
Okay, this seriously has my curiosity peaked. I think I must try this.
I make yogurt with our raw goat’s milk and it turns out very similar to yours. I’ve read to heat it, but no one has been able to say definatively that the bacteria in the milk needs to die before adding the starter culture, so I’ve left it raw. We like what we end up with, so I’m probably not going to change-yet. I usually need to buy another container of yogurt from the store (we use Brown Cow creamy top-plain) but mostly because I forget to set aside a cup to use in the next batch, lol.
I too started with the crockpot method, but the steps seemed, well odd. It didn’t work either. I tried the oven with the light on and off, as the temp varied. I tried just leaving it on the counter, but nothing was really good until my SIL gave us a Yogourmet. I will disagree with you on them being a waste of money. I don’t know how much she spent (think she found it on clearance) but it’s the only thing that has given us consistently wonderful yogurt! I have seen versions where you add a small amount to several tiny cups and those are a waste of time, space, and money, but the Yogourmet does 2 qts bulk at a time.
We’ve found the best results come from a 65/35 ratio of Alpine milk with Nubian/Boer cross milk. The N/B has more fat, but this year the fat in one of the Alpine’s milk has been rivaling it while she’s nursing. I don’t know how long that will last though!
If our method stops meeting our needs I may try a heritage culture, thanks for sharing your experience!
Kelly – I have not seen the Yogourmet, but it sounds far better than the ones with all the jars – especially if you are planning on straining the whey out anyway. If it works for you, that’s great. I stand corrected. I’ll amend my advice to say, try making yogurt without a machine first. Make sure you like it and will continue before you go spend the money (and clear space in your cupboard).
I have yet to try fresh goat’s milk. I bought some in a carton at the grocery store once and it was so “goaty” I couldn’t stand it. I’ll have to give it a try again, but this time fresh. Thanks!
Thanks for your clear description here. I’ve made yogurt a number of times, but it’s turned out inconsistently. Some good, some less so. I learned a few things about why, so now I’ll be eager to try again. And I LOVE the fruit-on-the-bottom idea. So clever! My husband loves yogurt in his lunch, and I usually scramble at the last minute to mix up the yogurt, sweetener, and fruit. So simple to do it all ahead of time (duh)…
We both thank you!
Kathy – I’m glad you found some good information in my post. I think the number one problem is being unable to keep the yogurt at a consistent temperature while it cultures. That’s why I like the electric blanket.
oh and, just a tip on the fruit on the bottom yogurt. Don’t overfill it (like I did in the picture – oops). It makes it hard to stir. Good luck and let me know how it goes!
When we first started drinking goat’s milk (from our own goats) it tasted “goaty” too. It doesn’t anymore and I’m not sure if it’s from a dietary change or us getting used to it. We have friends that try it and like it, so my guess is the dietary change has improved the flavor. We stopped giving them grain at milking time and I can’t recall if the flavor change occured then or prior, really. I’ve not tried any from a store, so I can’t comment on it.
I forgot to mention the first time that cheesecloth is a waste of time, but butter muslin is very useful for straining. I prefer not to use disposable items when possible, and I use butter musling regularly. If you aren’t familiar with it, it’s just a finer weave of cheesecloth. I have a square cut to fit over my qt mason jars and then set a canning funnel over that to strain the goat milk. I have other sizes for draining/straining cheese too.
We also love the plastic lids for the mason jars but use a dry erase marker to date/label items.
Kelly – I haven’t heard of butter muslin – where do you get it? I really like clean linen dish towels, or even bandanas. The weave is light enough to keep back the solids, but loose enough that the whey drains quickly.
It’s a lot like what you’ve described. I’ve heard of people cutting up old t-shirts and/or pillow cases for the same purpose. I just found some today at New Frontiers (are they in OR?) about an hour away from me. Most people look at me strangely when I ask about it. The first batch I got came from The New England Cheesemaking Co, online. I thought I’d be “smart” by cutting it to specified sizes for various jobs, but I need large squares for draining cheese. Thinking about it, I probably could have cut an old pillow case down the the right height and used that, maybe I still will!
Just tried making yogurt with my Excalibur. It’s been 7 hours and it is still somewhat runny. I had a thermometer so I made sure the milk reached 180 and cooled to 109.8 before adding the Yogourmet. Excalibur set at 115. Not sure what’s going on, but I thought it should have set up a bit more than it has at this point. I have noticed on several websites such varied times of incubation. I read the longer the time, the more tangy the yogurt. Is that still true if it takes 12 hours just to get it to set? Anyhow, regardless if this batch doesn’t meet expectations, I will try again. We eat a lot of yogurt and make smoothies everyday, sometimes 2x a day for about 4 of us, so I would like to get this down to a predictable science. Even if it doesn’t set up, will it be okay to add to the smoothies. It doesn’t produce bad bacteria from being left in that temperature for a long period of time without maturing to “yogurt” does it?
Thanks and I learned from reading all the posts. Glad to live in the age of internet that can reach across the miles and connect people of similar interests!!
Donna – Sorry I didn’t get back to you last night. Did it ever thicken? I have not tried using a dehydrator to incubate, though I have heard of it.
If the yogurt did not set up it was likely due to one of two factors.
First, your temperature: have you calibrated your thermometer to make sure it is accurate? To do so, put it in a glass of ice-water. It should read 32 degrees. If not, it is reading off. I once had one that was 12 degrees off. Big difference. If the thermometer is fine, use it to check both the temperature of the Excalibur air temperature while it is running and the temp of your yogurt as it incubates. Just like oven temperature, dehydrators can differ from what the dial is set to. You may need to set it higher.
If temperature is fine, check your starter: did it say “live active cultures” on the packaging? Was it plain, unflavored yogurt? Full-fat is best; reduced or fat-free often has stabilizers to make it thick. It’s possible that they could interfere with the culturing process…
I hope these ideas help. If it did not set up, it is fine to use for smoothies, unless of course you notice a bad smell. It should smell like milk or yogurt. If it smells sour (rancid), throw it out.
Donna-115 might be a bit too hot, shouldn’t go over 110 according to what I’ve read. It won’t “set up” until it has been chilled. Just like warm sour cream won’t be thick, neither will warm yogurt. Put it in the fridge for 8 hours and see what you’ve got. At the very least you can use it in smoothies and try again.
Stopping from Mom Loop! I pinned with great idea!
Thanks so much for your site! I’m new I this and reading your process helped me immensely! Cheers!
Thank you so much for all the tips! I have just started using non-homogenized milk to make yogurt and I need all the help I can get!
I used to make yogurt with organic milk from the supermarket – Kroger’s Simple Truth, and it was incredibly easy, I didn’t even need to heat up the milk beforehand, and it would set beautifully in the jar without any whisking or straining.
With non-homogenized milk, texture of yogurt was weird and clumpy, until I tried whisking it, like you suggested. Without straining, the chilled yogurt was quite thin and could even be poured from the jar – still tasted good though! I strained the next time, and it became much thicker (yay!), however, I lost a ton of volume – maybe a quarter of what I started out with. Is that normal? Also, I notice that the whisked yogurt doesn’t separate, as I would have expected with non-homogenized milk. (Unless of course, I gobbled up the cream top without realizing it..) Do you find the same?
Thanks again for sharing your tips and experience!
I’m glad that you found my tutorial helpful!
I do lose volume when I strain, but I find the results in texture and flavor are well worth it. If you would like a thicker yogurt without straining, you may want to try using a Greek yogurt starter. Even if you do still decide to strain some of the whey, you may not need to strain as much.
I have noticed that once the yogurt is well whisked, the cream does not rise to the top again. I love the cream top, so that is a bit of a loss. Sometimes we scoop some of it off and eat it before whisking. 🙂
Thanks for stopping in. If you have any more questions, let me know and I will do my best to answer.
Thanks Heidi! The internet and all you kind people have become my best teachers 🙂
Do you think I lose volume because the cloth I use to strain the yogurt in is not fine enough? I am using an old t-shirt…Maybe I should double up the layers, or use a cloth with finer grain? I’ll definitely try using a different starter and see how that goes as well.
Also, when heating the milk, do you let the milk stay at 180 degrees for a good while, or do you take it off the heat immediately?
With all this experimenting required to get a good end product, I can see why some people don’t mind paying alot more to get someone else to do it. But I’m not giving up yet! There’s something incredibly satisfying about making something yourself, overseeing the entire process, and knowing exactly what went into it – that in itself is quite priceless and well worth the effort!
It is a good feeling to learn to do it all yourself, isn’t it?
An old t shirt should be fine. Is the whey clear (but yellowish) or cloudy/milky? If it is very cloudy, you are losing milk solids and will want a finer weave. If it is clear, it is fine. You just lose volume because you are removing liquid.
There is no need to hold your milk at 180. You can take it right off the heat as soon as it reaches that point.
Thanks Heidi! When I strained yogurt that was made in a yogurt maker, the liquid was clear. When I strained yogurt that was made in the oven, the liquid was really cloudy. I used the same cloth both times, so it probably isn’t the cloth’s fault? I’ll try doubling up the cloth next time anyway, to see how it goes.
When I take the yogurt out of the oven, there’s a layer of clear yellow liquid on the top, with bits of white stuff floating around. The yogurt underneath is quite firm, although a little clumpy. The white stuff floating around the whey is what bothers me. Is that normal?
For the oven batch, I started off with 6 cups of milk, and ended up with 3 1/2 cups of yogurt. Out of curiosity, roughly how much volume do you normally lose? Is this why Greek yogurt is usually more expensive than the regular kind? 😉
A little bit of white stuff in the why seems to be pretty normal. I get that too.
As for volume, it depends on how long I strain it. You can stop straining whenever it is the thickness you like. I’ve strained as little at 1-2 cups and as much as 4 cups of whey off. (That makes a really thick, sour cream consistency.)
I processed my yogurt over night, and realized I forgot to add the culture. I used raw milk. Is it ok to go ahead and add in the culture and process again?
If you heated the milk to 180 first, you killed the good bacteria. Without adding the yogurt culture, it is possible that having no good bacteria gave space for bad to grow. I’m not sure I would risk it. However, you could taste it. If it doesn’t taste bad, you could try it. Again though, if it was mine, I probably would (sadly) dump it.
Hello, Love this tutorial, we actually use a yogurt maker. but I wanted to know can you fix yogurt when you have killed the culture with milk that is too hot by adding more culture? or will this just ruin it?
I think you would be fine as long as you add it after it has cooled to the right temp. Lets me know how it turns out.
Thanks thats what I was thinking, Will let you know what happens!
LOVE this post! I’ve wanted to make homemade yogurt, but never got the guts to try. I’m a little more encouraged after hearing your experience. I’ve saved some yogurt containers from the store-bought (we usually get Mountain High) but would you say jars are better? Thanks again for posting this!
Thanks! You could use the yogurt containers, but they are made to be disposable. I would be a little concerned about BPA from the plastic leaching into your food. If you prefer plastic, those Ball containers I link to in the post are probably a better bet.
If you run into any problems, let me know and I’ll troubleshoot it with you. Good luck!
Just made some yogurt this weekend following your instructions. I used fresh partially pasteurized milk (pasteurized to 150F) from a local dairy farm. I just wanted to add that I opted to not heat to 180. In fact, only heated it up to about 120, then cooled it to 110 and added Fage as a starter. It came out very very thick, sweet and delicious. I further strained it for two hours to get the same consistency as the Fage and its perfect. So you can actually do it without heating to 180 and killing off everything first. So excited it came out! Now, I’m not sure it I’d try it that way for completely raw milk or not. May have to try.
Heidi,
Thank you so much for the detailed methodology! I made yogurt yesterday using some starter culture (real home made yogurt from a neighbour) & it turned out great! Well, almost;
1) It seems to have gotten too sour! I left it for like 9 hours, maybe thats too long ? Any recommmendation on how a working person could “auto-mate” this ?
2) The final yogurt is very creamy but also sweet! Is there some method you’d recommend by which I could maybe reduce the sugar content in the yogurt? (I use full fat Vitamin D milk as the base)
Thank you for this wonderful blog! I’m sure I’ll find more such gems as I go through your posts 🙂 !
Regards,
Vishnu
Can I just say- I love your advice but one thing- it’s not a waste to have a yogurt maker if it folds flat for storage. Guaranteed the yogurt maker I use is smaller than the space your electric blanket takes up! Not trying to be snotty- HONESTLY- just want others who are weary of “homemade” methods of incubation to know that there is one yogurt maker out there that takes up very little room when not in use and can guarantee an accurate temperature through the incubation period per thermostat-controlled heating.
No joke- I have the same counter as you, the same jars, the same markers, the same lids, etc, et cetera… It feels like we should already know each other but the many, many different rigged methods of incubation on the WWW just plain scare me (especially when you live in a home that has very inconsistent temps from day to day). I can’t afford to waste that much milk if the yogurt didn’t turn out b/c of the temperature inconsistancy so I went on the ultimate quest to find a yogurt maker that takes up as little room as possible yet can put out a large capacity for this family of five!
I, like you, also have an affinity for Amazon and that is where I found the Brod & Taylor Yogurt Maker and Bread Proofer. For anyone else who is weary of the many methods of incubating your yogurt and like appliances or furniture or just about anything that is multi-purpose(Transformers generation here!), you won’t be disappointed by this maker. It basically looks like an over-sized breadmaker but folds up to the size of a closed laptop when not in use, and isn’t averse to being stored sideways, upside down, or any way you can fit it in your kitchen :~)
Also, for the days when I’m making enough yogurt for my kids’ school snack (we’re talking enough to feed 35 or so elementary children) it can put out at least 2 gallons of yogurt and you’re not stuck with their jars or brand-specific containers. It doesn’t come with any containers actually, you supply your own. I happen to have a massive quantity of many different shapes and sizes of glass jars and any plastic cap that could possibly fit gets kept, too. Essentially any container will do, but would you really want to use plastic after you just got done sticking it to the man and making your own lovely yogurt?
In any case, I just wanted other readers to know that there is at least one yogurt maker out there that can perform great and take up VERY little space!
Thanks for the information. I’ll have to check it out.
i found a recipe on line that used a crock pot and oven (off and without the light on) it called for some powdered milk.. i used 1 or 2% milk and plain yogurt .. it was great, thick, creamy and not sour.. but i always buy vanilla..
another website said skim milk works..
so im trying that..
another said to add sugar and vanilla with the starter to sweeten and flavor it..
i used splenda..
this time i used greek vanilla as a starter..
so i changed a lot of things but what the heck..
its in the oven, ill know what i have in the morning
i only work a few days a week but get home at 7pm or later.. too late to have a meal.. the yogurt is just enough.. i only bought the big containers and could eat an entire carton in one or 2 servings depending on the day..
i used my stick blender to add baking cocoa to store bought vanilla yogurt and made chocolate yogurt.. tried it with my home made but it collapsed and didnt firm up after it was in the fridge.. i will try it again with the blender, if it doesnt work i may try to ‘fold’ in cocoa or chocolate syrup
got tired of the pile of containers i was taking to recycle..
now im using them for my yogurt.. they work just fine.. i left it in the crock pot liner in the oven over night, put it in my plastic containers and into the fridge the next day
i started with a gallon of milk so if any one of the elements i changed goofs me up.. oh well..
ill change fewer things next time.. try to figure out what works..
Isn’t it fun to experiment with? Good luck!
so this morning it was a little loose.. not thick like when i used 1or 2% with plain yogurt in my first batch..
i packaged it in 5 32oz yogurt containers, so im still recycling
i tried to fold cocoa into one but it didnt desolve.. i put it in the fridge and will see if it gets firm.. ill try my stick blender again..
it blends into store bought just fine, makes it a little loose.. but in my first batch it collapsed into milk again.. i love my chocolate yogurt…
i put hersheys syrup in another container..
didnt put enough.. ill put more when i eat it..
left the other 3 vanilla.. the flavor seems to be like the store bought vanilla.. splenda and vanilla extract
my 1st batch was almost as thick as greek (because of the powdered milk, i didnt strain it) and it wasnt sour.. again maybe because of the powdered milk..
i did use fat free milk and 0 fat greek vanilla the first time..
next time i may keep the ff milk but use regular vanilla yogurt and see what adding a little fat does..
i paid 2.59 for my gal of milk on sale and 2.98 for dannon 0 fat vanilla greek, i used about 1/3.. it was what was left in the container.. so i spent about 3.50 for 5 32oz containers.. even on sale if im paying 1.98 for my yogurt.. thats 9.90 less 3.50 leaves me 6.40 for gas..
and i dont have to stash all those yogurt containers for the recycle..
im liking this a lot..
liked the idea of fruit on the bottom.. i freeze strawberries, blueberries and raspberries.. put them on a plate to freeze so they are loose in a plastic bag.. great for smoothies but im thinking i may defrost a few and put them in the yogurt i portion for work lunches..
cant wait to see how this chills and anxious to make a new batch if it isnt thick like the first one..
fun stuff…
heres one for you..
frozen tilapia.. fresh spinach, any pasta sauce, glass dish, cover with plastic, microwave 2-6 min on high depending on the number of portions and thickness.. vera cruz style.. pretty yummy..
sometimes i add oregano, basil but its good with just the sauce.. i put 2 layers of fresh spinach..
being single i make 2, eat one and have one for later.. if you like cold pizza, youll like this cold… or reheated
well i have moved on to batch #4..
batch 3 i couldnt find my notes and found a site that i had saved that told me to let it cool 1 hr.. i think it was too hot, i used a candy thermometer but i misread it.. and i forgot to put in the powdered milk before it started cooking in the crock pot, it went in when i was starting to cool it.. i got yogurt drink.. used 1% and plain greek yogurt but i goofed so this one didnt count.. the vanilla and sweetener made it a great tasting yogurt drink..
batch 4 was 1% and plain greek yogurt.. this time i put in the powdered milk and added the vanilla and sweetener with the yogurt starter.. its thicker than store bought, tastes as good (vanilla) or better.. has a little whey on top but no more than store bought..
still cant get the chocolate thing going but i just realized the dannon light blueberry is real loose so i guess that just happens with some things are added..
monday ill do batch #5, i bought 2% which is what i used the first time when it came out almost as thick as greek with no whey.. the first time i didnt have the vanilla or sweetener and it wasnt very sour.. crock pot with powdered milk low 3 hrs, cool 2 hrs then add sweetener, vanilla, starter… wrap in blanket over night in oven.. done..
i made 1/2 gal the first time and have used a gallon for the rest.. always making it on monday, packaging it tues morning.. its sat and i have part of one 32oz vanilla and part of a 32oz chocolate .. it will be gone by the time the next batch is packaged..
this is just too easy and tastes too good..
i am buying a new starter each time.. for $1 or less (if its on sale) there is no reason to use what i made, and i do have the vanilla, sugar, powdered milk in mine, i would have to process some in a separate container..
Monday I was patient, took the liner out of the crock pot metal cooker to let it cool.. used my candy thermometer and kept checking it.. instead of 2 hrs it was about 2.5 before it got down to almost 100.. well closer to 100 than 125.. added the cup of sweetener, 1 tbs vanilla and a cup of plain greek yogurt to my gallon of 2% (cooked for 3 hrs with 3 cups of powdered milk).. wrapped it up and in the morning it was pretty thick.. added chocolate syrup to 2 of the recycled 32oz yogurt containers.. it didn’t thin it out much.. thicker than store bought regular yogurt.. the vanilla is a little thicker..
and the flavor… soooo good…
im making a gallon every week.. if I don’t fill them to the top I get 5 containers..
milk is on sale this week so I made a batch on Monday and ill get another milk sat before the sale is over for my batch next week..
planning on taking the strawberries, blueberries and raspberries I have in the freezer for smoothies and ill use my stick blender puree one of the berries to add to one of the vanilla containers..
I bought 2 or 3 of each strawberry and blueberry dannon at the last sale.. anxious to see if I can fold fresh berries into my homemade yogurt without thinning it..
I learnt few more things about home made yogurt from ur blog. Thanks. Pls what happens when d starter I use for culturing my yogurt is too little 4 d quantity of milk and is it possoble to add starter before heating up the milk? Thanks
No. The starter will die if it is heated too far beyond the 120 degree mark. It must be added after the milk has cooled.
As for the quantity, I would suggest making a smaller batch and using it to culture your next batch.
Good luck and have fun!
I have been making a gallon of yogurt once a week since I found this site (and a few others) and figured out what works best for me…
I recent read that ‘greek yogurt’ has been producing so much whey that they are adding a thickener instead of straining the whey out of the yogurt.. so.. you are no longer getting a concentrated version.. the protein is now the same as regular yogurt..
heres what I do…
1 gal of 2% for 3 hrs on low (crockpot) with 4 cups of dry milk whisked in… I was using 3 but 4 gives me less whey (not that there is much with 3 cups)
then off for 2 hrs… I take the crock pot liner out of the cooker and set it on the counter..
I used to ck the temp but found 2 hrs works..
I take some out and whisk in 1 cup of unbranded greek yogurt, then put it back in the pot.. I have used some from a previous batch but a small container is only .98 or .89 on sale so I buy a fresh one each time I buy my gallon of milk
I add 1 Tbs of vanilla and 1 cup of sweetener
I put it in the oven (oven and oven light off) wrapped in a beach towel.. I try to have it in the oven around 6pm…
I package it the next morning.. anywhere from 7-9am depending on my day..
I love chocolate anything and put 2 ladles in a container, whisk in some cooking cocoa, add more yogurt, whisk it more, until its almost full.. I found this works better than my stick blender
I reuse the big yogurt containers that I bought in the past and fill to the line.. I get 5 of those and make 3 of them chocolate.. its so good I can eat almost an entire container in one sitting
I freeze strawberries, blueberries and raspberries on plates then put them in bags to keep in the freezer…
when I take out the vanilla I layer it with frozen berries and in a few hrs they are soft and blend into the yogurt… very yummy
It is so thick I use it instead of sour cream or for a fruit dip… I cut up a papaya and the yogurt was great with it..
I may layer it with jello for a parfait .. or layer it with fruit in a stem glass for a party…
anyway… it took a few tries but this is what works best for me..
like I wrote… I have been making a gallon a week… and im not tired of it..
when I think I love the chocolate, I take out the vanilla and cant put it down..
unless I put it in a container, I can eat the entire thing..
So this is embarrassing but I’m going to admit it anyway! I made yogurt for the first time and left it out over night – I was told that was all I needed to do and in the morning I would have yogurt – In the morning it wasn’t really yogurt-like so I thought I’d leave it out a bit longer and set it aside on the stove. Out of the way, you know.
Then I forgot about it. And then I threw something in the oven… and the yogurt I had left on the element got really hot and by the time I realized what I had done, the yogurt had separated and it looks awful. I don’t want to throw it out.. do you think it’s ruined now?
Oh no! I’m sorry. But yeah, if it has separated that usually means it got too hot and the culture died. There isn’t a way to fix it. But do try again. You’ll get the hang of it!
LAZY YOGURT……Appreciate the article and all comments, although I have not read them all…….If you are as lazy as I am, yet you love yogurt, this is the way I have mad my yogurt for years…..go to the store and get 2% or with-more-fat 4 liter bag of milk.
Use a double boiler ( I use a pressure cooker (PC) put inside a larger pot so that the bottom of PC does not touch the bottom of the larger pot), pour the milk inside the PC and put the whole thing on the stove at high heat. Remove the PC when water starts boiling. take the PC lid off and let it cool in room temperature until milk is warm to touch. If you missed it and it cooled too much put it back directly on the burner and warm it up while stirring it constantly. Add a cup or so of plain yogurt to the milk, stir it well, put the PC lid back on, then put the PC in middle of a blanket and wrap it up well and let it sit over night. In the morning the product is ready. Cheers
im trying to get away from dairy..
I used almond milk but got distracted and it didn’t turn out the 2x I tried to make it..
as soy is less $ I put a gallon of plain soy milk, in crock pot on low for 2 hrs.
let it cool to 115, add 4 cups of powdered milk, less than a tbs of good vanilla, 1/2 c of dominos 1/2 sugar 1/2 stevia..
wrap in a towel and put it in the oven with the light on for about 10 hrs (I put it in for overnight)
its so thick you stand a spoon up in it..
I used it in place of sour cream and salad dressing.. great on fresh fruit..
for chocolate yogurt use real cocoa (1 tbs in a 32 oz yogurt container) fill the container 2/3, add the cocoa, use a wisk to blend it in, fill the rest of the container and wisk it again.. its the best..
oops.. for got to add the 1/2 cup of plain yogert for a starter.. when its about 115 degrees
I absolutely love this tutorial and my mom and I both use it for our homemade yogurt! I love how you explain every little thing and make the whole process totally doable! Even the fact that you use coffee filters instead of cheescloth made the whole process just that much more accessable to me! Thanks again!
Hi Heidi,
Great tutorial. My family is just now reintroducing dairy and I have a lovely farm near by where I get my raw milk. I made a batch of yogurt on Sunday (low temp version) and while it is great, I lost a lot in straining. Do you find that you have a larger yield with the heated method?
Also, I live just about 45 minutes south of Portland, OR. Are you still willing to gift starter cultures? I used Fage for this past batch and I would really like to move away from commercial yogurt as well as the added expense. Even so, if I did my calculations correctly, my homemade yogurt is still cheaper than a store bought. I like that!
Please let me know about the starter. 🙂 Thanks again for the great tutorial.
Kathleen
i make a gallon at a time using soy milk in a crock pot.. to avoid the loss I add powdered milk, 1 cup makes it thin like regular yogurt, 2 cups makes it more like greek
Hi Kathleen,
Thank you!
I do lose quite a bit of yield after straining, even when heating the milk, though I like my yogurt quite thick, so that accounts for part of it. I strain of about half the yield in whey to make it super thick.
I’d love to share starter with you, but sadly, I let my culture die. With all the book related travel I’ve had over the last year or so, I haven’t been able to keep up with my yogurt making. One day, I’ll get back to it.
I bought my starter from Cultures for Health and it lived for several years. Well worth the (small) initial investment.
So sorry to hear your culture died but congrats on having a lot of work! I made a batch using your method last night (using the rest of the Fage I had purchased) and it is LOVELY! So much thicker than my first batch. I have it cooling right now and I will strain it, but I think it will yield more than the first batch. It was hard to heat it at first, but then I had to put everything in perspective – I am using the freshest milk I could possibly get my hands on unless I owned my own cow, so in reality, what I lose in a few enzymes, I gain in freshness and sustainability.
I really appreciate your getting back to me. I think I will head over to Cultures for Health and buy a starter. I am so new to this, that I assume it will grow some over time and I would be happy to share with you. 🙂
Kathleen
Thanks Kathleen. That’s very kind of you.
The other thing to remind yourself about heating is this: Any bacteria (even the really good kind in raw milk) will compete with your culture, weakening it over time. You are just setting a a neutral place for it to grow!
Enjoy!
Hey Heidi! Soo I’ve made yogurt on the stove before but decided to try a crock pot method (I have a new baby and I thought leaving it in the crock pot while doing other things sounded great!) Sadly, (without thinking) after the first initial heating I was supposed to add vanilla and some sugar and then let it cool longer before adding the starter culture… BUT I accidentally added the culture with the vanilla and sugar! 🙁 From other posts, i’m gathering that my batch is doomed but wanted to see if I could wait for it to cool to 110 and then add ANOTHER 1/2 cup of starter yogurt. (maybe the first would just die off and blend into the milk…?)
Thanks!!
You absolutely can! The culture you initially put in was likely killed by the heat, but the milk is still good. Adding new culture after the milk has cooled should work fine.
Congrats on the new baby!
happy to find you’re still here
for some reason when I came to florida this winter I started messing up my yogurt… couldn’t figure out why it wasn’t the usual thickness… came back here to see my postings… aha !!! think I got it… just packaged a batch so I’ll make adjustments next week..
ive been using soy milk but considering going to organic, ill ck to be sure there is enough fat
big shock.. looked at the labels of all the tuna at the store last night… only one $3 a can brand was without ‘soy’…
what is ‘soy’ doing in tuna with water…
so disappointing…
I accidentally left my yogurt in my yogurt maker for two hours after the auto shutoff had turned off. How will this effect my yogurt? It was off but still warm.
I was also supposed to let my yogurt in the rectangular box portion of the yogurt maker continue incubating for another 2 hours (with the machine turned back on).
I removed my jars and turned the machine back on… after this 2 hr warm but not on gap. Will this ruin my yogurt?
That should be fine. Milk with yogurt culture added that gets too cool can always be warmed back up and incubated. Good luck!